UsingEclipse
Building and source level debugging OOT C++ modules with eclipse
The procedure described below allows eclipse to be used for code syntax checking and building. A C++ out of tree module can also be source level debugged within eclipse through the use of the module’s QA functions. Note that this process does not allow you to source level debug a running flowgraph.
PREREQUISITES:
The following instructions have been tested with Eclipse CDT V 4.6.3 in Ubuntu LTS 16.04. The PyDev eclipse plugin was also installed.
The following instructions and example assume that you have first created the example out of tree module as described in https://wiki.gnuradio.org/index.php/OutOfTreeModules and can build and run the QA test successfully.
PROCEDURE:
Step 1 - Set up environment variables.
user@machine:~/work/gr_demo$ source /data/work/gr/setup_env.sh
Note that the path will depend on where gnuradio was installed. In the below description the PREFIX for the installation is /data/work/gr/
Step 2 - Create Build Directories and run cmake.
Eclipse expects the build directories to be siblings (not children) of the source directory. Accordingly, build directories should be set up as follows:
- mymodule/gr-module <- source
- mymodule /gr-module-debug
- mymodule /gr-module-release
Assuming that gr-howto has been installed in ~/work/gr_demo/ :
user@machine:~/work/gr_demo$ mkdir gr-howto-debug
user@machine:~/work/gr_demo$ mkdir gr-howto-release
user@machine:~/work/gr_demo$ cd gr-howto-debug/
user@machine:~/work/gr_demo/gr-howto-debug$ cmake -G "Eclipse CDT4 - Unix Makefiles" -D CMAKE_BUILD_TYPE=Debug ../gr-howto/
user@machine:~/work/gr_demo$ cd ../gr-howto-release/
user@machine:~/work/gr_demo/gr-howto-release$ cmake -G "Eclipse CDT4 - Unix Makefiles" ../gr-howto/
This above commands create debug and release build configurations for the module that can be imported into eclipse. Both can be imported into eclipse. Alternatively, only the debug configuration can be imported into eclipse and make can be run manually from within the gr-howto-release directory when the module is ready to be deployed. For example:
user@machine:~/work/gr_demo$ cd ~/work/gr_demo/gr-howto-release
user@machine:~/work/gr_demo/gr-howto-release$ make
user@machine:~/work/gr_demo/gr-howto-release$ make install
Note that if you have previously run cmake with the build directory as a child of the source directory, you may need to clean up some of cmake's generated files for this to work.
Step 3 – Import the debug project into eclipse.
1. Run eclipse from within the same terminal so that the environment is set up properly.
user@machine:~/work/gr_demo/gr-howto-debug$ eclipse &
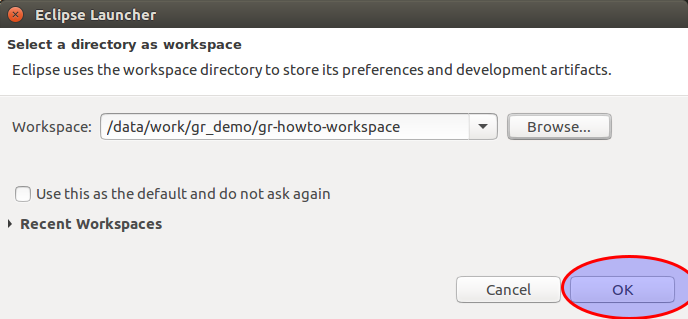
2. Create a new workspace (or use a previously created one)
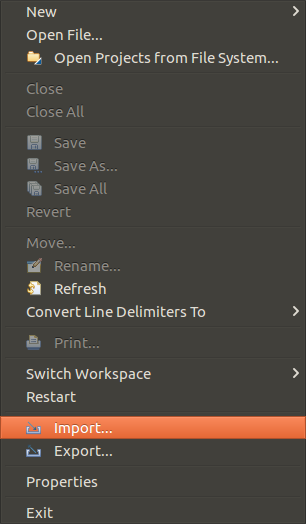
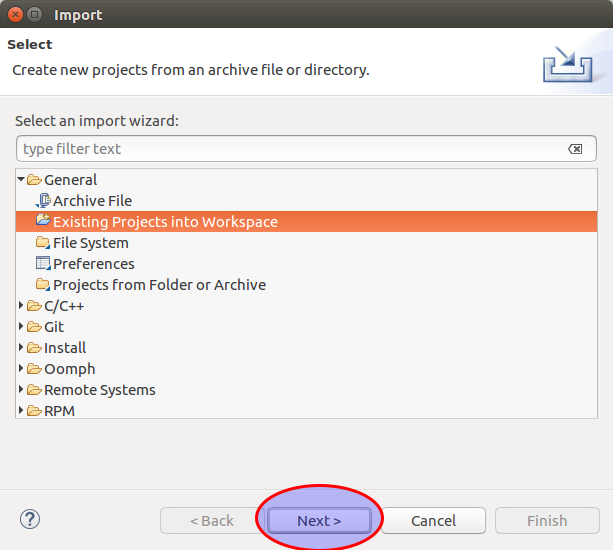
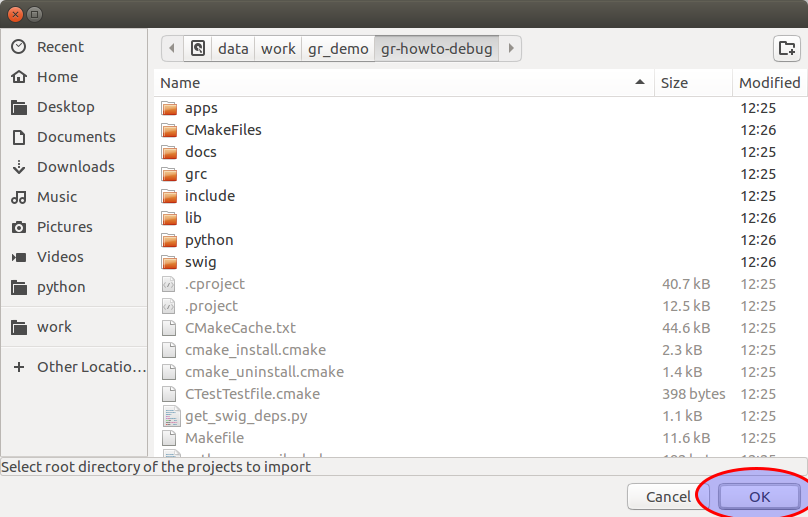
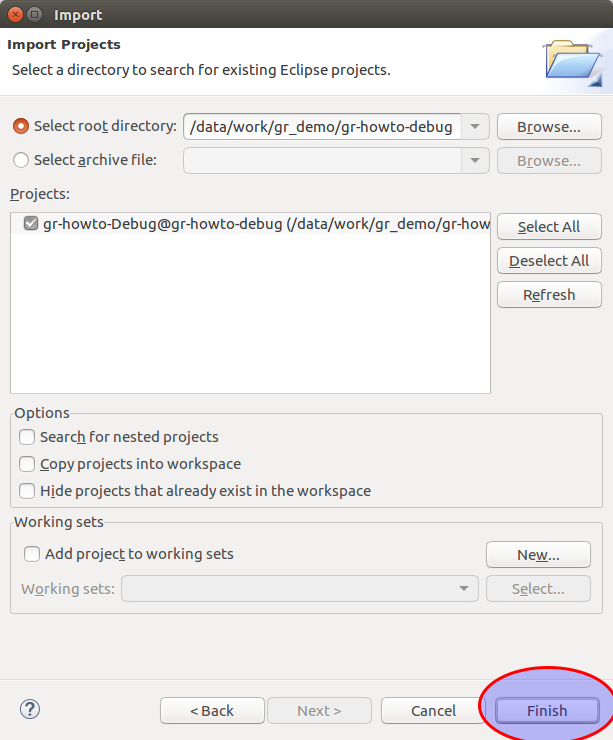
3. Import the eclipse project from the gr-howto-debug directory created earlier.
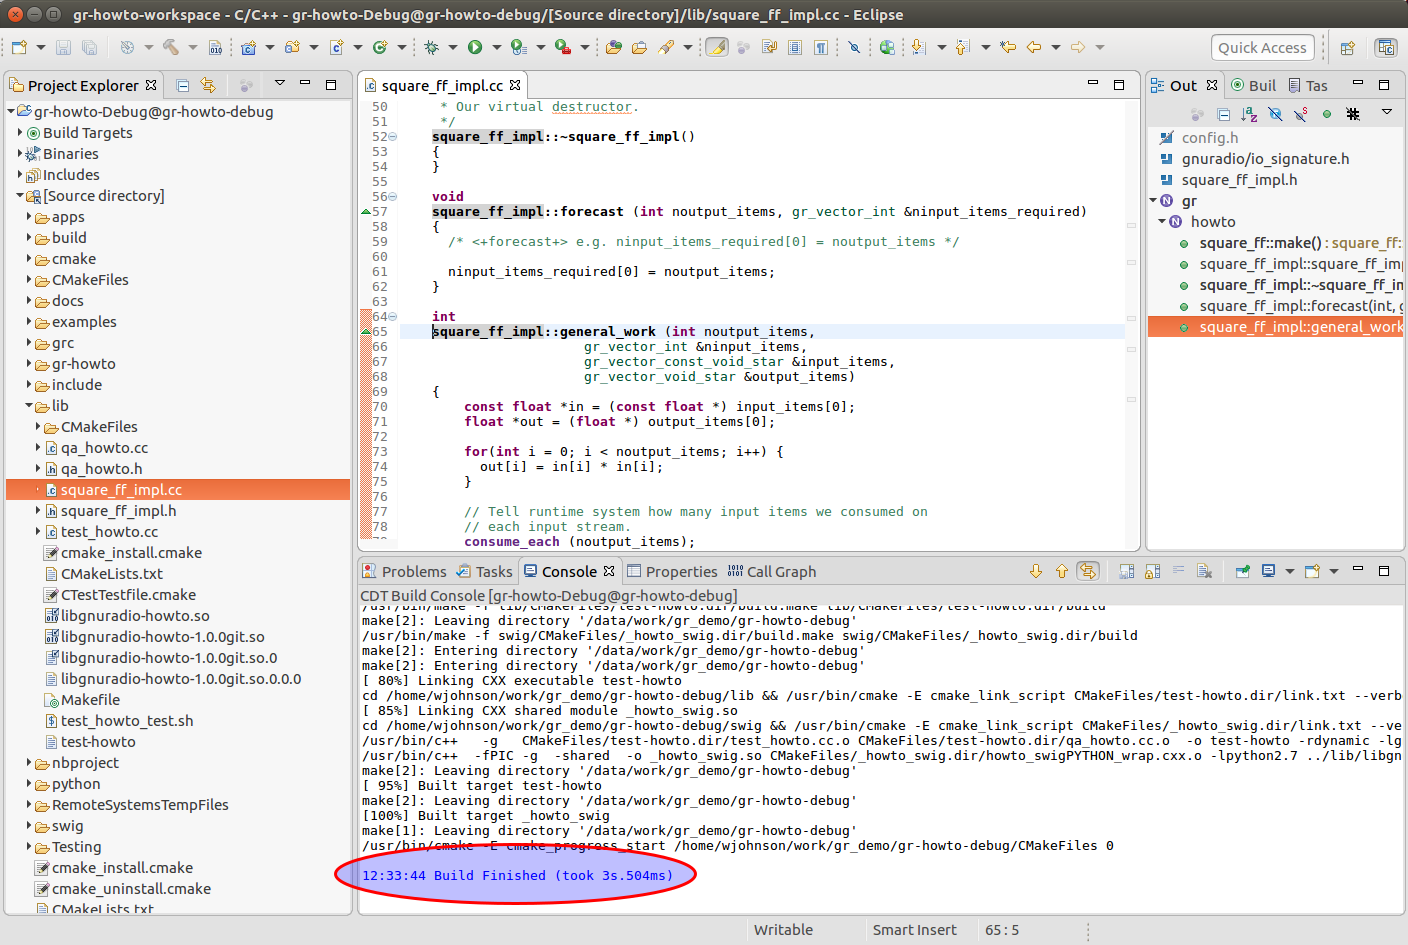
Note that this creates a number of directories that mirror the project source tree. The project source will all be under [Source Directory].
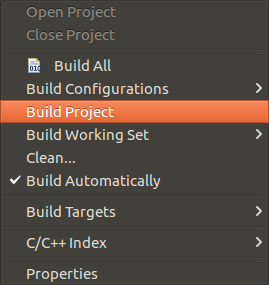
Step 4 –Test that you can build the project from within eclipse.
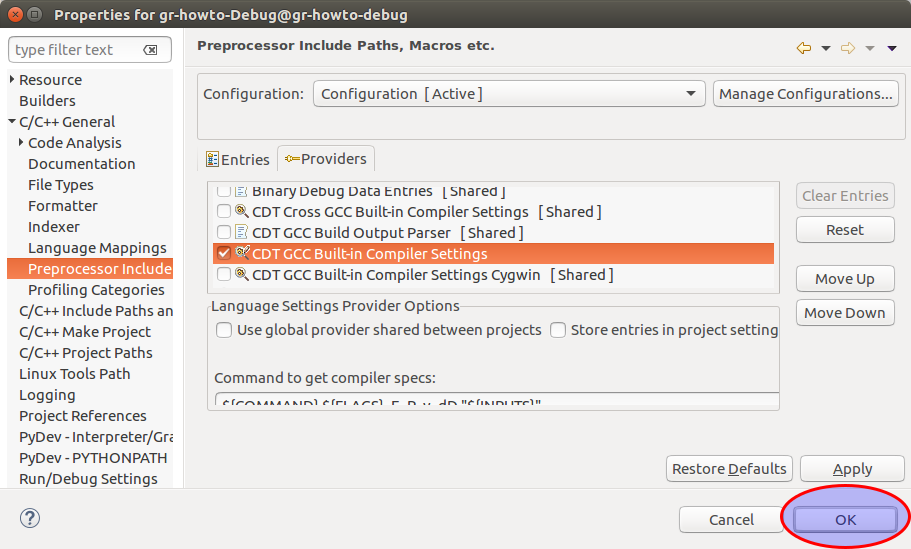
Step 5 - (optional) Modify the project properties to include additional preprocessor options.
Without this option, eclipse will sometimes flag valid code as having errors. It does not affect building or debugging, only code checking.
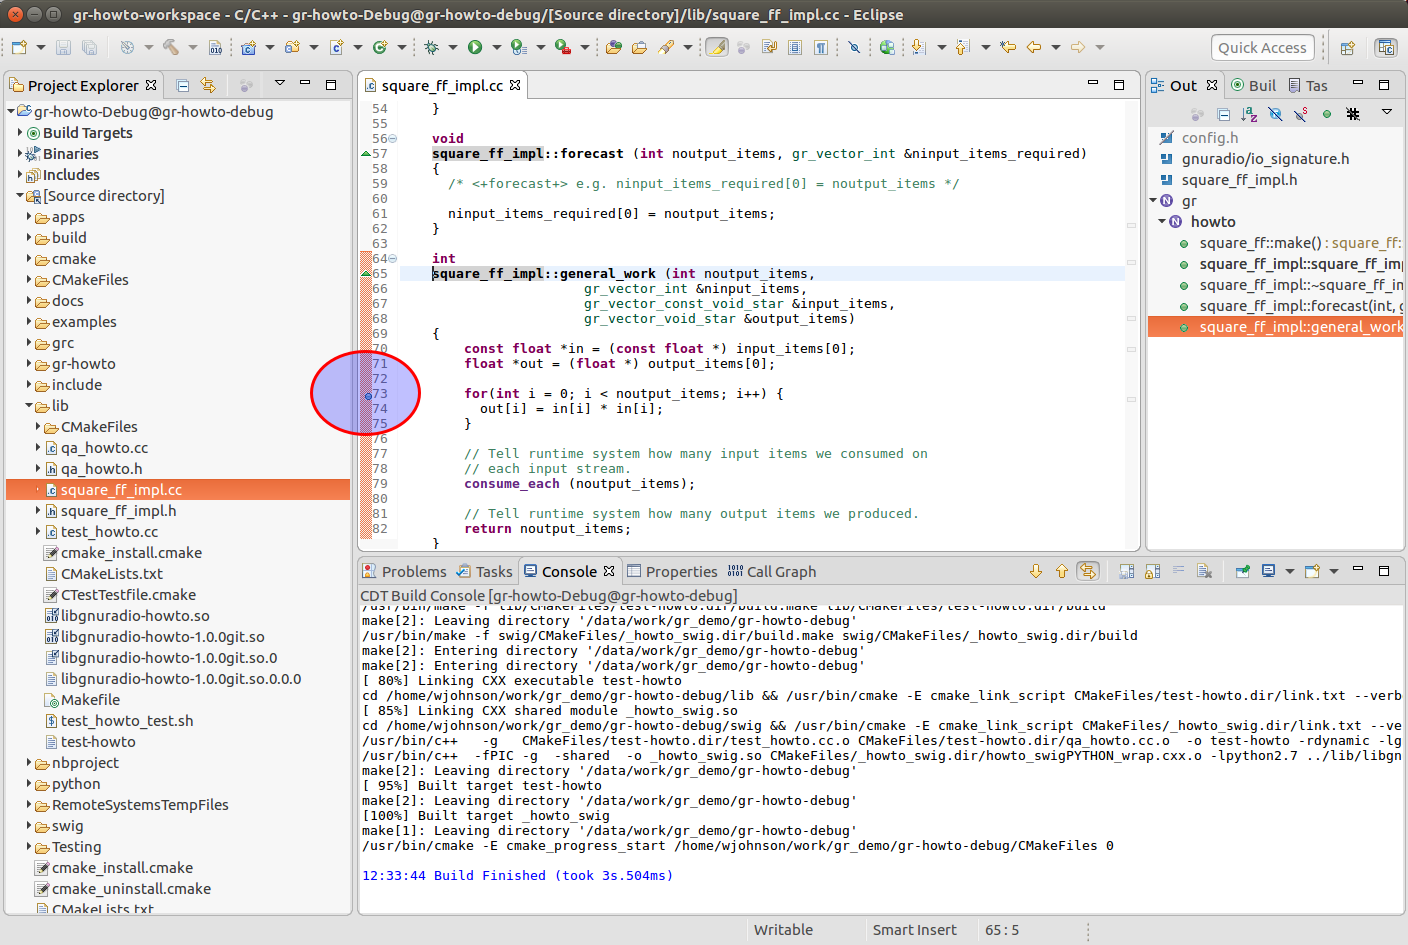
Step 6 - Set a breakpoint in the work function.
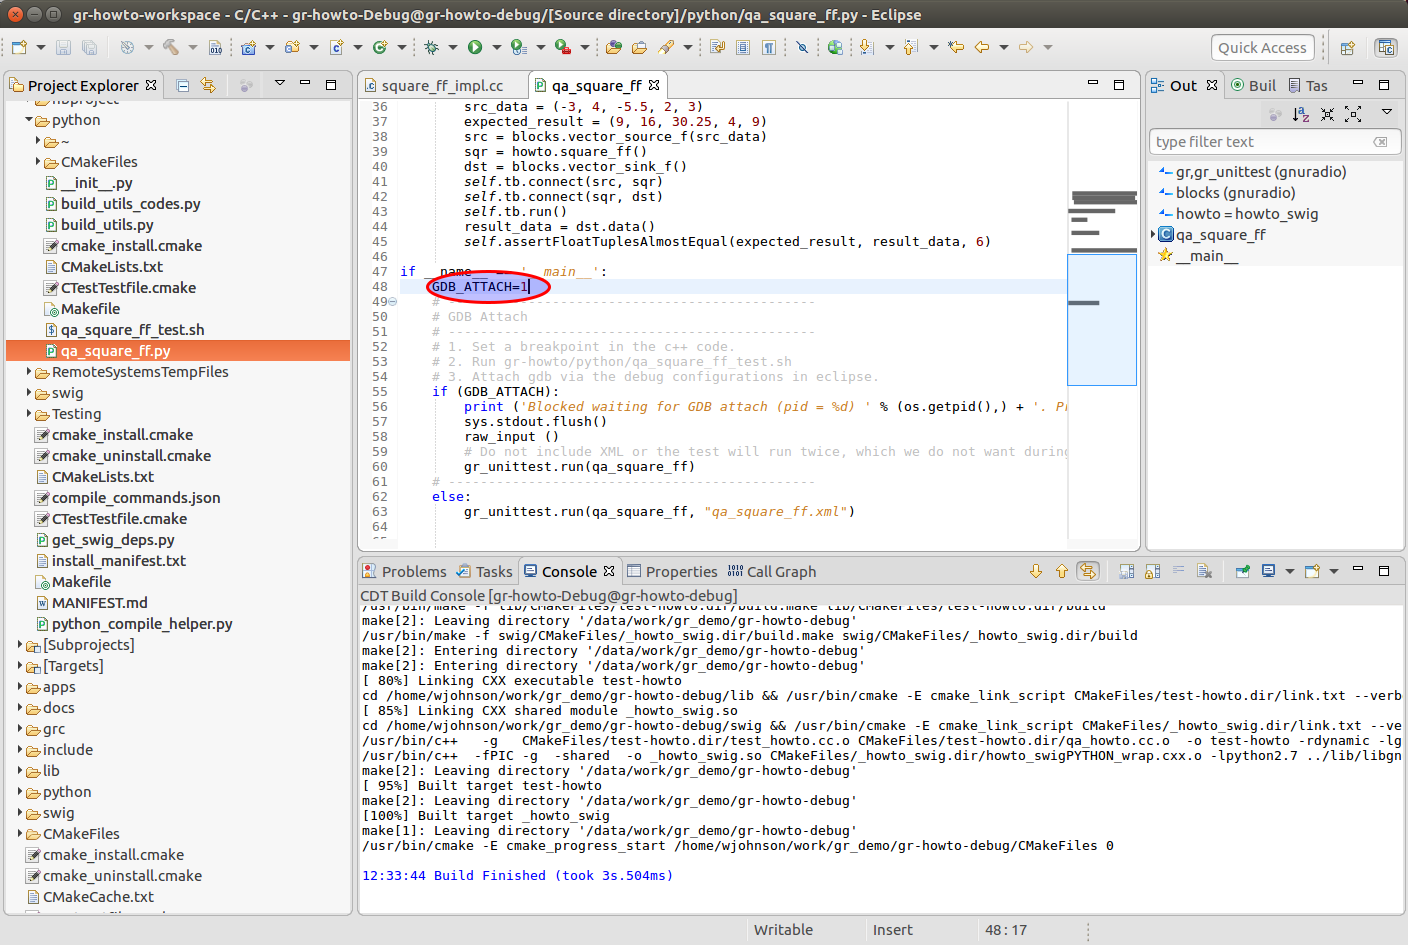
Step 7 - Modify Python QA test.
Modify python/qa_square_ff.py as follows:
1. Add imports of os and sys:
import os
import sys
2. Add code to wait for GDB to attach:
if __name__ == '__main__':
    GDB_ATTACH=1
    # ----------------------------------------------
    # GDB Attach
    # ----------------------------------------------
    # 1. Set a breakpoint in the c++ code.
    # 2. Run gr-howto/python/qa_square_ff_test.sh
    # 3. Attach gdb via the debug configurations in eclipse.
    if (GDB_ATTACH):
        print ('Blocked waiting for GDB attach (pid = %d) ' % (os.getpid(),) + '. Press ENTER after GDB is attached.')
        sys.stdout.flush()
        raw_input ()
        # Do not include XML or the test will run twice, which we do not want during debug.
        gr_unittest.run(qa_square_ff)
    # ----------------------------------------------
    else:
        gr_unittest.run(qa_square_ff, "qa_square_ff.xml")
Below is the complete file:
#!/usr/bin/env python
# -*- coding: utf-8 -*-
#
# Copyright 2017 <+YOU OR YOUR COMPANY+>.
#
# This is free software; you can redistribute it and/or modify
# it under the terms of the GNU General Public License as published by
# the Free Software Foundation; either version 3, or (at your option)
# any later version.
#
# This software is distributed in the hope that it will be useful,
# but WITHOUT ANY WARRANTY; without even the implied warranty of
# MERCHANTABILITY or FITNESS FOR A PARTICULAR PURPOSE.  See the
# GNU General Public License for more details.
#
# You should have received a copy of the GNU General Public License
# along with this software; see the file COPYING.  If not, write to
# the Free Software Foundation, Inc., 51 Franklin Street,
# Boston, MA 02110-1301, USA.
#

from gnuradio import gr, gr_unittest
from gnuradio import blocks
import howto_swig as howto
import os
import sys

class qa_square_ff (gr_unittest.TestCase):

    def setUp (self):
        self.tb = gr.top_block ()

    def tearDown (self):
        self.tb = None


    def test_001_square_ff(self):
        src_data = (-3, 4, -5.5, 2, 3)
        expected_result = (9, 16, 30.25, 4, 9)
        src = blocks.vector_source_f(src_data)
        sqr = howto.square_ff()
        dst = blocks.vector_sink_f()
        self.tb.connect(src, sqr)
        self.tb.connect(sqr, dst)
        self.tb.run()
        result_data = dst.data()
        self.assertFloatTuplesAlmostEqual(expected_result, result_data, 6)

if __name__ == '__main__':
    GDB_ATTACH=1
    # ----------------------------------------------
    # GDB Attach
    # ----------------------------------------------
    # 1. Set a breakpoint in the c++ code.
    # 2. Run gr-howto/python/qa_square_ff_test.sh
    # 3. Attach gdb via the debug configurations in eclipse.
    if (GDB_ATTACH):
        print ('Blocked waiting for GDB attach (pid = %d) ' % (os.getpid(),) + '. Press ENTER after GDB is attached.')
        sys.stdout.flush()
        raw_input ()
        # Do not include XML or the test will run twice, which we do not want during debug.
        gr_unittest.run(qa_square_ff)
    # ----------------------------------------------
    else:
        gr_unittest.run(qa_square_ff, "qa_square_ff.xml")
This code will allow you to optionally halt the qa test and wait for the debugger to attach.
Step 8 - Enable GDB_ATTACH.
Set GDB_ATTACH=1 in qa_square_ff.py (set to 0 if not source level debugging)
Step 9 - Run the QA test from the terminal.
user@machine:~/work/gr_demo/gr-howto-debug$ cd ~/work/gr_demo/gr-howto-debug/python
user@machine:~/work/gr_demo/gr-howto-debug/python$ . qa_square_ff_test.sh
Blocked waiting for GDB attach (pid = 14102) . Press ENTER after GDB is attached.
At this point the test will block so that the debugger can attach.
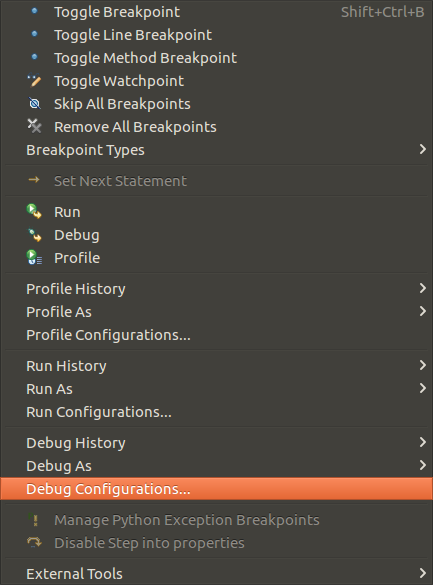
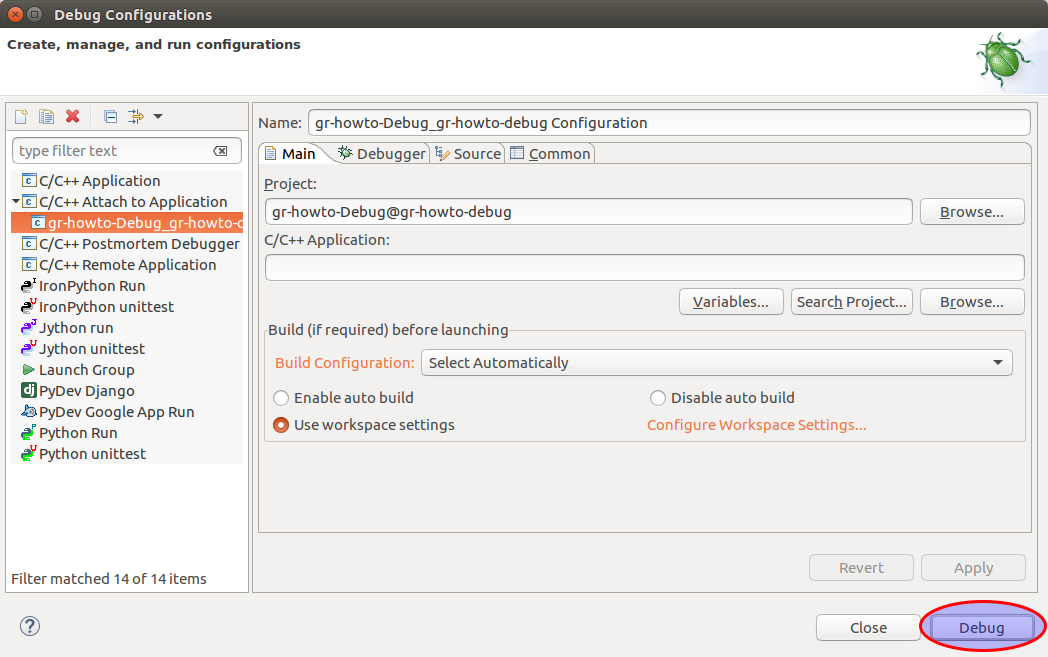
Step 10 - Attach the debugger in eclipse.
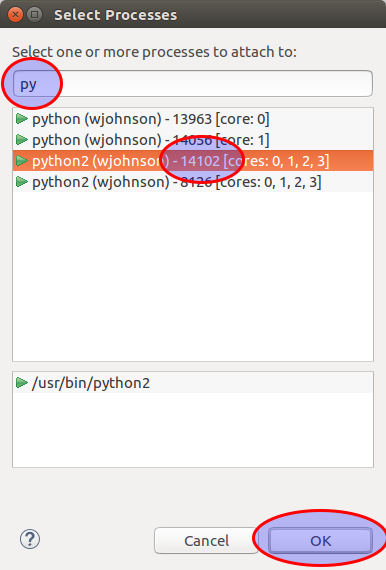
1. Attach the debugger in eclipse
2. Select the process ID indicated in Step 9.
Hint: type “py” in the text box to limit the choices to python processes.
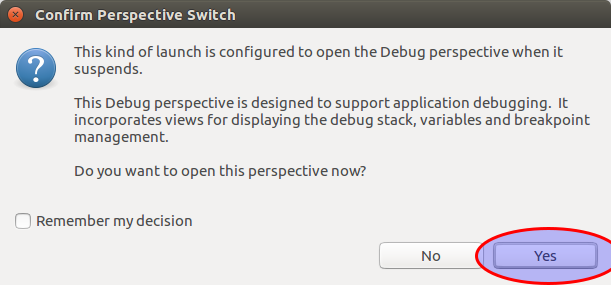
3. Confirm the perspective switch
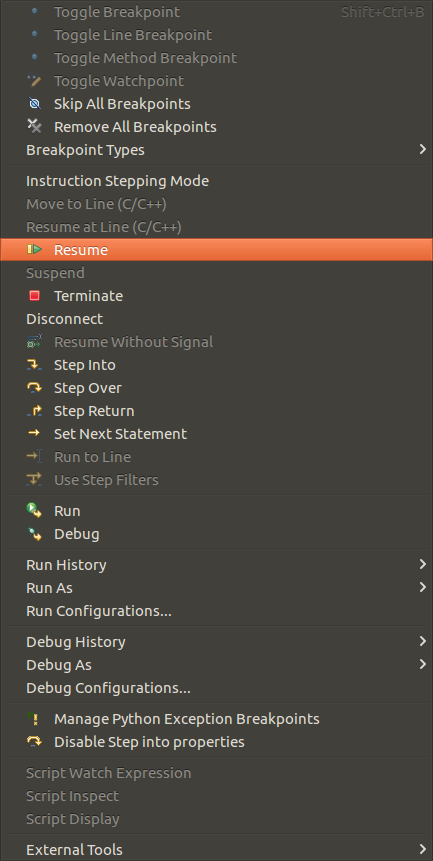
4. When GDB attaches, it will immediately break. Select Resume to continue.
Step 11 – Continue the QA test by pressing [ENTER] in the terminal window.
user@machine:~/work/gr_demo/gr-howto-debug$ cd ~/work/gr_demo/gr-howto-debug/python
user@machine:~/work/gr_demo/gr-howto-debug/python$ . qa_square_ff_test.sh
Blocked waiting for GDB attach (pid = 14102) . Press ENTER after GDB is attached.
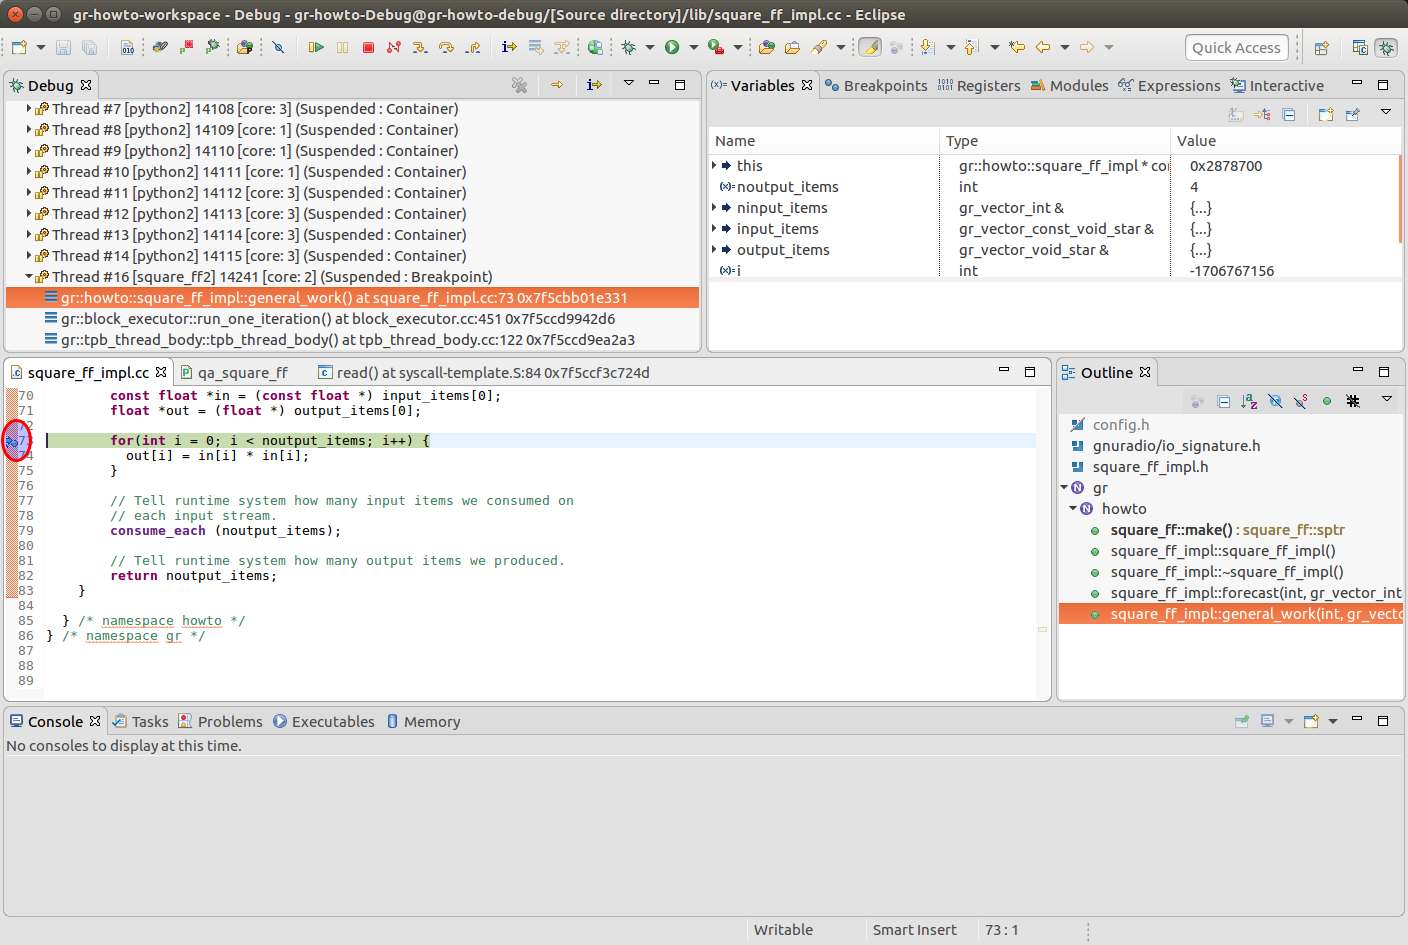
Step 12 – Perform Source level debugging.
After [ENTER] is pressed, the QA test will continue. This should result in the process halting at the set breakpoint in the work function.
You can now step through your code. Repeat steps as necessary.
