Creating Your First Block: Difference between revisions
Jump to navigation
Jump to search
Mattcarrick (talk | contribs) No edit summary |
Mattcarrick (talk | contribs) No edit summary |
||
| Line 35: | Line 35: | ||
[[File:PythonBlockCodeFunctions.png|500px]] | [[File:PythonBlockCodeFunctions.png|500px]] | ||
The ''import'' statement includes the NumPy and GNU Radio libraries. The ''__init__'' statement: | |||
# Accepts the ''example_param'' parameter with a default argument of 1.0 | |||
# Declares the block to have a ''np.complex64'' input and output, which is the GNU Radio ''Complex Float 32'' data type | |||
# Stores the ''self.example_param'' variable from the input parameter | |||
Revision as of 15:44, 7 January 2022
This tutorial will guide you through creating your first block with the Embedded Python Block.
Embedded Python Block
The Embedded Python Block is a tool to quickly prototype a block within a flowgraph. Search for the Python Block and add it to the workspace:
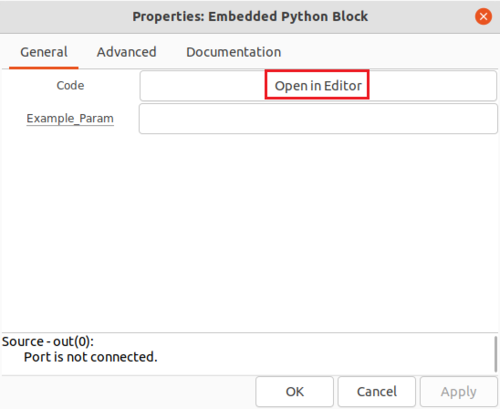
Double-click the box to edit the properties. The Embedded Python Block has two properties,
- Code, a click-box which contains a link to the Python code for the block and
- Example_Param, an input parameter to the block.
Click on Open in Editor to edit the Python code:
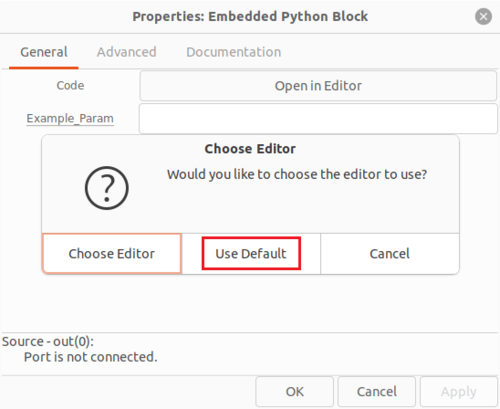
You will be prompted with another choice for which editor to use to write the Python code. Click Use Default:
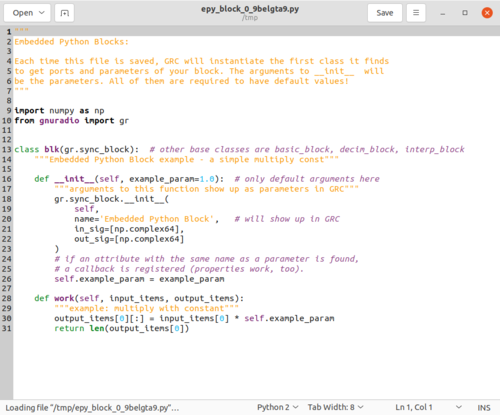
An editor window will then display the Python code for the Embedded Python Block:
Editing Python Block Code
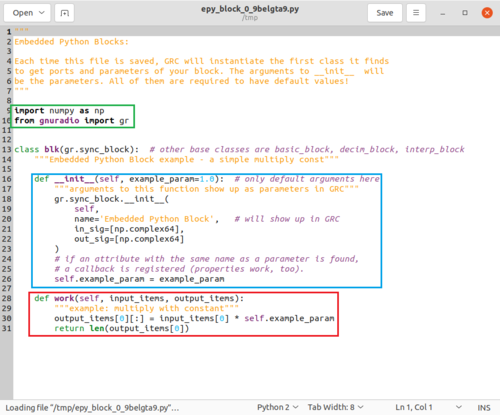
There are three important sections in the Python block code:
- import statements in green
- __init__ function in orange
- work function in red
The import statement includes the NumPy and GNU Radio libraries. The __init__ statement:
- Accepts the example_param parameter with a default argument of 1.0
- Declares the block to have a np.complex64 input and output, which is the GNU Radio Complex Float 32 data type
- Stores the self.example_param variable from the input parameter


